General Settings
General setting options
General settings that are applicable for all campaigns
General campaign settings
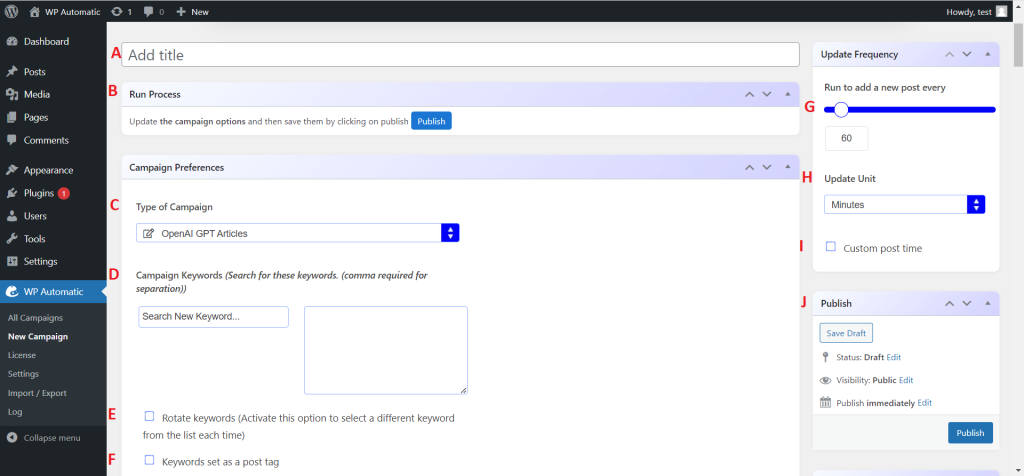
A. Add Title:- This option allows you to edit the title of the campaign.
B. Run & Status:- This section provides the details of the saved campaign and a button to run the campaign manually and test the outcome.
C. Campaign Type:- To choose/change the type of the campaign. For instance, you can change the campaign type from an article campaign to a Facebook campaign.
D. Campaign Keywords:- It is the section that helps to add, edit, or remove the list of keywords. This list decides what type of content should be posted. Just provide multiple keywords separating each keyword with a comma.
E. Rotate Keywords:- By default, the plugin will post the content based on the first keyword. If no post is found, then it looks for the content as per the second keyword. In case, if you want to post content on the basis of different keywords (each time), then you can opt for the same by activating this option.
F. Set the keywords as post tags:- Check/activate this option to add the keywords as a WordPress tag in your posted content.
G. Update Frequency value:- You need to provide the numeric value of update frequency here. For instance, 1 Post in 60 minutes.
H. Update Unit:- To choose the unit of time for setting the frequency of post updates.
I. Custom Posting Time:- To schedule the posting time of the content.
J. Publish Options:- This section contains options for publishing the campaign.
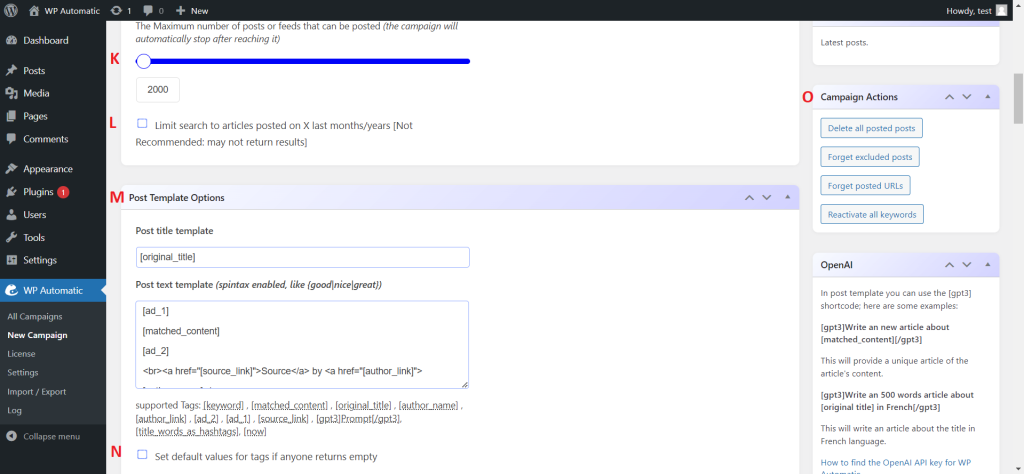
K. Maximum post limit:- Set maximum number of posts of the campaign. Once this plugin has posted these many posts, then the campaign will be automatically stopped.
L. Limit Search:- The template of the post title is defined here. By default, the tag [original_title] will be replaced by the title of the extracted post.
Post Template
M. Post Title Template:- This section provides options to set the layout of the fetched content using supported tags. For instance, the [orignal_title] tag refers to the original title of the scraped content. You can change its placement by changing the location of this tag. These tags will differ according to the campaign type.
N. Set default values that return empty values:- This option helps in setting the value of the tags which are returning a null or empty value. For example, add “[product_img]|Not Available” in this section and it will help in displaying product images as “Not Available” in a situation wherein there is no image or null value in the [product_img] tag (extracted content).
O. Actions:- Quick actions are offered here for ease and convenience.
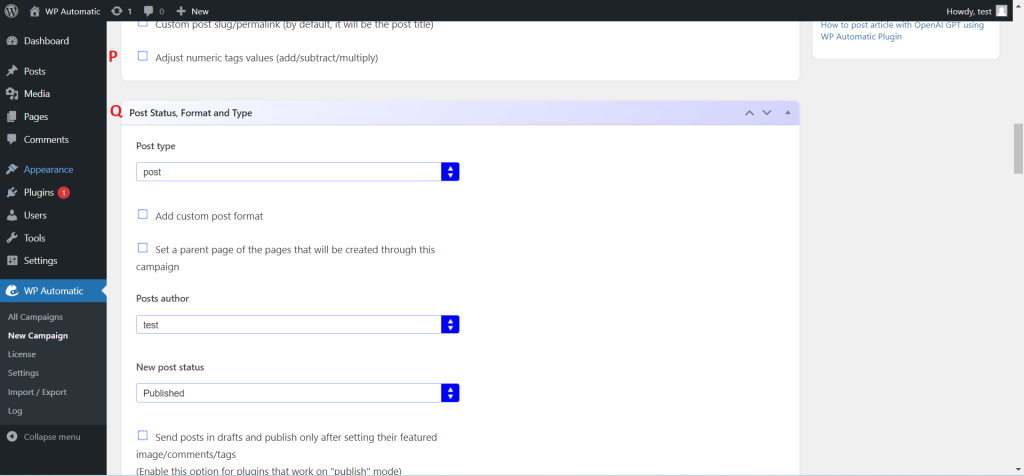
P. Adjust numeric tags’ values:- This option helps in making a calculation with numeric tags to return and display a specified value.
Q. Post Type, Format & Status
It includes all the options for setting the format and status of the post. It includes the following:
- Post Type:- It enables you to set post type as post, image, or attachment.
- Add Custom post format:- Check this option if you want to post a specific post type like only an image or only video (Note: Your WP theme should support that format).
- Set a parent page: – Click here to set a parent page of the extracted post.
- Posts Author:- Choose the name of the author from this list.
- New Post Status:- Set the status of all the new posts that will be created after content extraction.
- Add the post in drafts then publish it only after setting its featured image/comments/tags:- If you want to publish the post only after setting the image, comments, or tags of the new posts, then you can choose this option. It will help you create all the new posts as a draft.
- Set non-English posts status as pending:- Enable this option to keep non-English posts in the pending list.
- Add custom fields:- This option will help in adding more custom fields to your post.
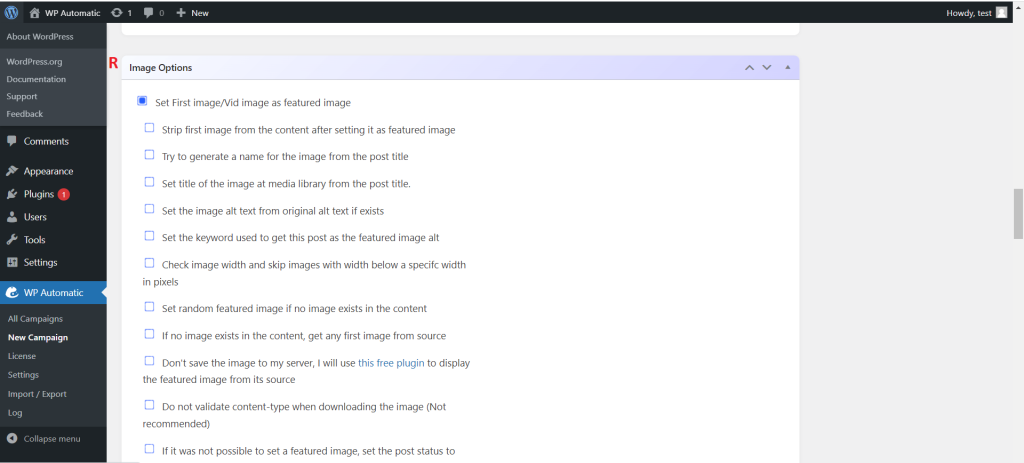
R. Images
This section provides all the control options for images that will be posted along with the content. It includes the following:
- Set first image/Vid image to featured image:- Check this option to get all the settings related to featured image format and title. It will include these options:
- Strip first image from content after setting it as featured:- Check this option to remove the image from the post after making it as featured image.
- Try to generate a name for the image from the post title:- Enable this option to let the plugin auto-generate the image name from the post title.
- Set title of the image at media library from the post title:- Activate this option to set the post title.
- Set the image alt text from original alt text if exists:- Enable this option to set the original alt text of the image as the alt text of the extracted image. This functionality will work only if the alt text for the image is present on the original source website.
- Check image width & skip images with width below a specific width in pixels:- Check this option to validate the image size and post only if the image width is equal to or more than the provided width.
- Set random featured image if no image exists in the content:- Enable this option and set the featured image of the post randomly when there is no image present in the extracted content.
- Don’t save the image to my server, I will use this free plugin to display the featured image from its source:- Choose this option to save images on a different server and use it as external images.
- Do not validate content type when downloading the image:- Check this feature to disallow validation of content type before extracting and posting the image.
- If it was not possible to set a featured image, set the post status to pending:- Check this option to store the post in the pending list when the plugin is not able to set the featured image due to data scarcity.
- Download images from the post content to my server:- This option will allow you to load all the images used in the extracted content on your server.
- When loading images, set the refer value to null:- Check this option to set images without any reference value.
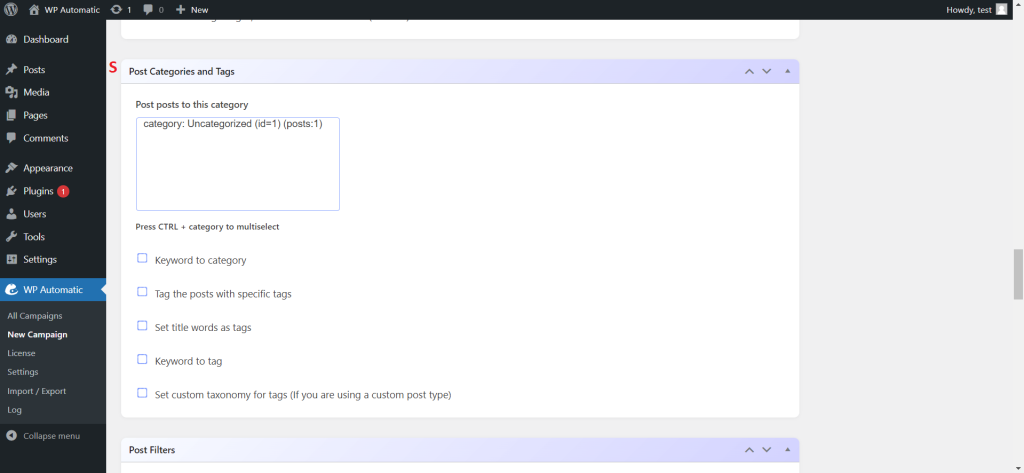
S. Categories & Tags
This section helps in setting the post category and post tag.
- Posts to this category:- Set categories of the post here.
- Keyword to category:- Check this option to set the keyword as post category.
- Tag the posts with specific tags:- This option will help you define a list of tags that should be set as post tags.
- Keyword to tag:- Enable these features to set the provided keywords as post tags.
- Set custom taxonomy for tags:- This option will help you set custom tags.

T. Post filters
Options to filter extracted content before posting.
- Post the article only if it has one or more specific words:- To provide the conditions in which the article can be posted
- Exact match words:- The section to provide the phrases that must match with extracted content.
- Apply to final content after filing the template:- This option will help in applying the filter conditions after setting it in the template.
- Only check at the title:- This option will let the plugin check only the title of the extracted post.
- Exact string match:- Enable this feature to validate the presence of provided words in the post title and/or post content.
- Post must contain all words:- Activate this option to post the content only if all the provided words are present in the extracted content.
- Skip the post if it contains one or more specific words:- To provide the conditions in which the article can’t be posted.
- Banned words:- The section to provide banned words.
- Apply to final content after filling the template:- Check this option to apply the condition after setting the extracted content in the template.
- Only check at the title:- Choose this option to let the plugin validate just the post title to find banned words.
- Exact string match:- Check this option to let the plugin skip the posting of the content only when the exact banned string matches with the content.
- Only post the article if it matches one of these specific REGEX:- The option to provide all the REGEX expressions that should match with the post content.
- Skip the post if the item matches one of these specific REGEX:- The option to provide REGEX expressions that defines the conditions for skipping the posting of the content.
- Skip the post if there is already a published one with the same title in the database:- Check this option to avoid duplicate posting.
- Skip posts if shorter than a specific length:- This is the option to define the minimum length of the post content.
- Skip posts if longer than a specific length:- This is the option to define the maximum length of the post content.
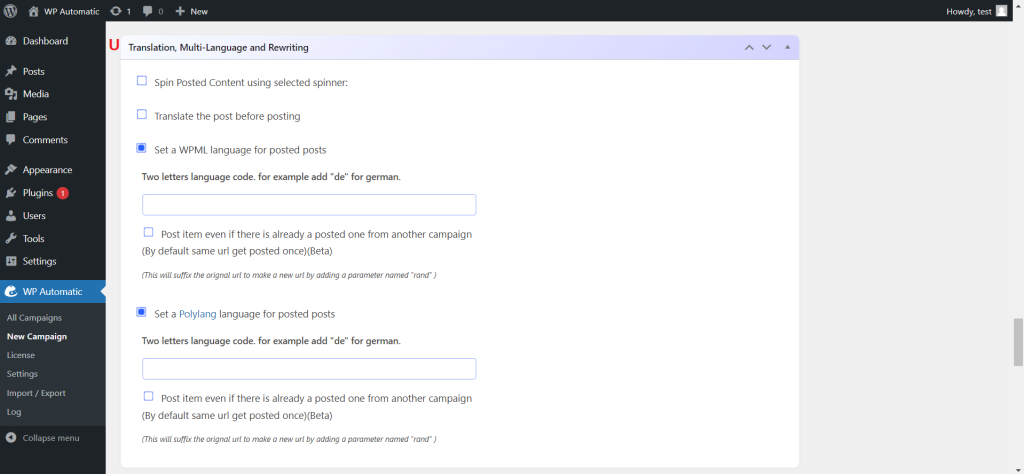
U. Rewriting, Translation, & Multi-language:- The options for content rewriting and translation.
- Spin Posted Content using “the best spinner”:- Enable this option to let the plugin rewrite the content automatically with the help of the “The Best Spinner” tool.
- Don’t spin the title:- Check this option to keep the original post title as post title.
- Translate the post before posting:- Enable this feature to translate the extracted content in your preferred language and then post it.
- Translator:- The option to choose the translator.
- From & To:- The option to choose the language for translation.
- Translate title also:- Check this option to translate the post title along with the content.
- If translation got failed, set the post status to Pending:- Choose this option to keep the untranslated content in the Pending list.
- Set a WPML language for posted posts:- To configure WPML language for your website
- Post item even if there is already a posted one from another campaign:- To allow the posting of duplicate content.
- Set a Polylang language for posted posts:- To configure Polylang language for your website
- Post item even if there is already a posted one from another campaign:- To allow the posting of duplicate content.

V. Content search/replace & modifications:- The options for making modifications in the content before posting it on the website.
- Search and replace:- The option to search & replace words from the content before posting.
- Search|replace (one per line):- Use this syntax for providing the words that need to be searched and word that needs to be replaced. For example
- Protect HTML tags before replacing:- This option will help to maintain the integrity of all the HTML tags before replacing any word. That means HTML tags won’t be replaced in any condition.
- Words replace:- Enable this option to let the plugin replace the words that are provided in the “Search|Replace” box
- Apply to titles also:- Check this box to apply the search & replace functionality on the post title as well.
- Use # as the separator between search and replace:- If you want to use # as a separator while defining search & replace strings, then you can choose this option.
- Replace specified keywords in the fetched article with a link:- This option will help in replacing the keyword with a link.
- Truncate content to a specific number of chars:- This option will truncate the fetched content to a limit that is defined here.
- Truncate title to a specific number of chars:- This option will truncate the title of the extracted content to a limit that is defined here.
- Number of characters:- Provide the number of characters to set the length of the title.
- Do not add “…” to the end of the truncated title:- Check this option to avoid the placement of “…” after truncating the title.
- Remove the last truncated word (not-complete) from the truncated title:- This option will allow you to remove the incomplete word of the truncated title.
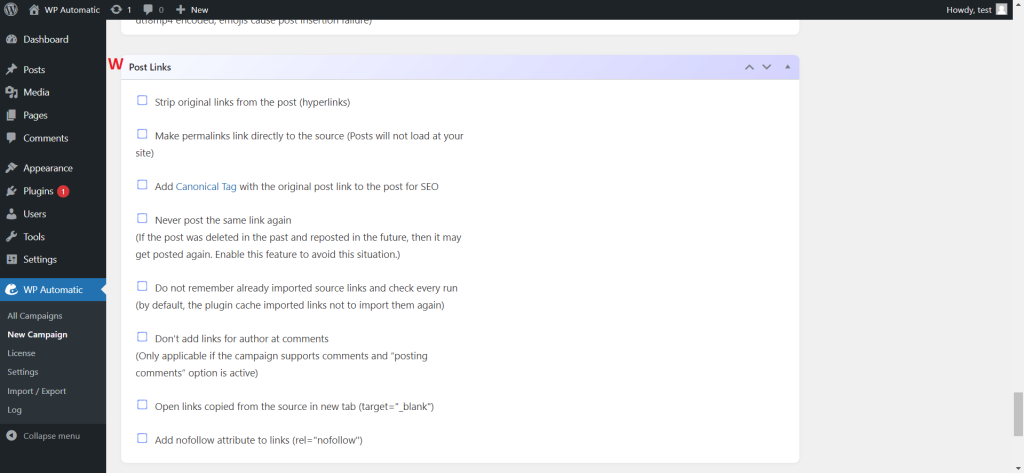
W. Links:- The section to change the attributes in extracted hyperlinks.
- Strip original links from the post:- Enable this feature to strip off the original links that are hyperlinked to the extracted content.
- Make permalinks link directly to the source:- This feature will open the extracted post as an external link and will not be loaded on your website.
- Add Canonical Tag with the original post link to the post for SEO:- To avoid a negative effect on your SEO, choose this option.
- Never post the same link again:- Check this option to avoid reposting.
- Don’t add links for the author in the comments:- This option will restrict links for the author in the comment section.
- Open links copied from the source in a new tab:- Check this option to open all the original hyperlinks in a new tab.
- Add “nofollow” attribute to links:- Choose this option to add (rel-“nofollow”) attributes to all the hyperlinks.
X. Miscellaneous:- All the other setting options are available here
- Never deactivate keywords for one hour:-
- Use proxies I have added at the settings page for the connection:- This option will help in using user-defined proxies.